
Cách lát gạch nền nhà không khó như bạn tưởng. Chỉ với 4 bước đơn giản là bạn đã có thể thực hiện được rồi. Tốt nhất bạn vẫn nên thuê thợ chuyên nghiệp đến lát gạch nền nhà để có độ chính xác, và thẩm mỹ cao nhất.
Tuy nhiên trong bài viết này chúng tôi vẫn sẽ cung cấp cho bạn cách lát gạch nền nhà đơn giản nhất, nhanh chóng nhất. Hy vọng với những kiến thức này bạn có thể tự lát gạch cho nền nhà mình, hoặc giám sát được các công đoạn thi công của thợ.
CÁCH LÁT GẠCH NỀN NHÀ THEO TỪNG BƯỚC
BƯỚC 1: TẠO LỚP NỀN BỀ MẶT
Bước đầu tiên trong cách lát gạch nền nhà chính là tạo lớp nền bề mặt.
Để có lớp nền cơ sở tốt bạn nên dùng nước tio căng dây lấy cốt và tạo độ dốc nếu chủ nhà yêu cầu.
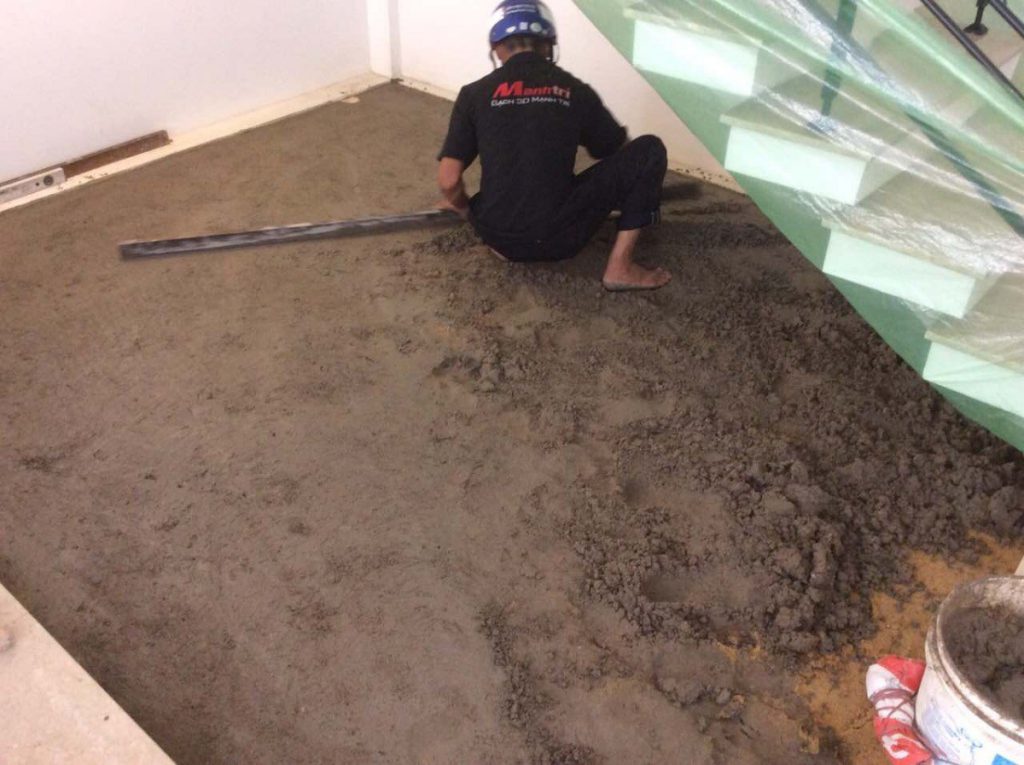
Trộn vữa lót xi măng, cát xây mác 50, 75 cho nước vào để ngấm dần, Vữa khô vừa phải không được để nhão quá hay khô quá.
Đổ lớp vữa lót vừa ngâm và trộn đều lên bề mặt nền nhà. Sử dung thước xây để tạo độ phẳng cho nền nhà. Chiều dày vữa lót lí tưởng là từ 2 – 3 cm. Không nên sử dụng quá dày gây ra tình trạng khó thi công.
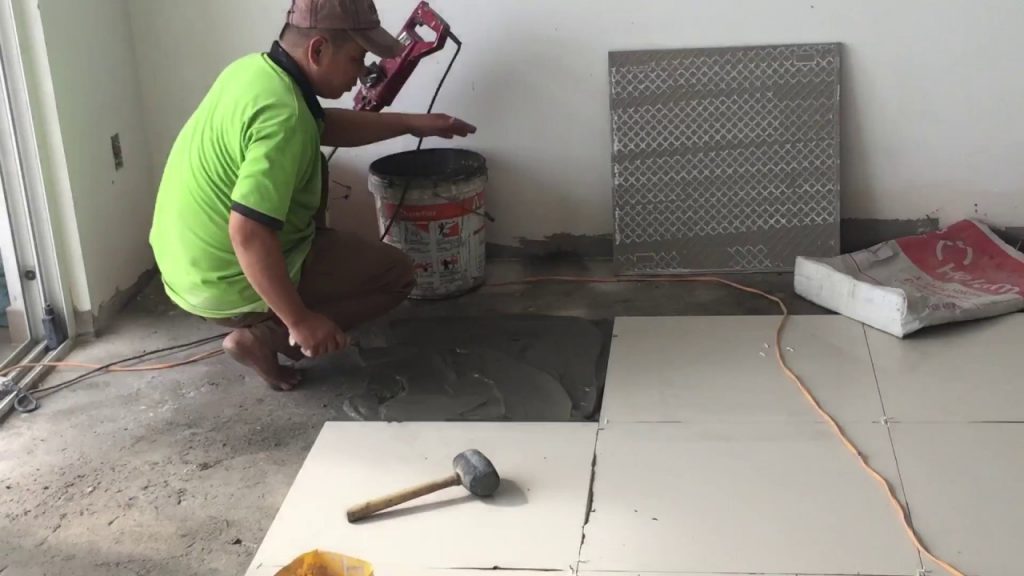
BƯỚC 2: THỰC HIỆN LÁT GẠCH
Bước thứ 2 trong cách lát gạch nền nhà chính là thực hiện lát gạch. Tại bước này, bạn cần thực hiện những hoạt động sau:
Sử dụng dây cước kể căng một đường thẳng sau đó lát trừ trái qua phải hoặc từ trong ra ngoài.
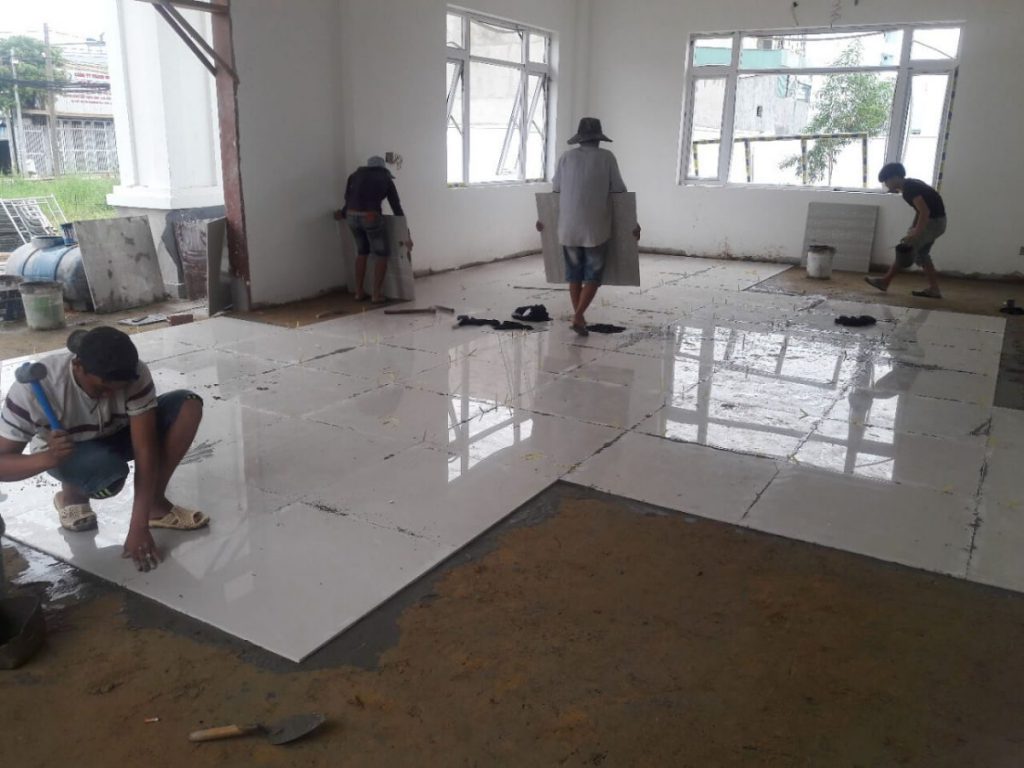
Lưu ý hãy Rải đều lớp nước xi măng đã chuẩn bị trước lên bề mặt cần lát gạch nhằm tạo nên độ bám dính giữa viên gạch với lớp lót nền
Dùng búa cao su để chỉnh gạch. Đập nhẹ vào 4 góc cũng như giữa viên gạch để tạo độ dính chặt giữa gạch và lớp vữa lót nền. Đồng thời điều chỉnh để cho bề mặt gạch bằng phẳng so với các viên còn lại.
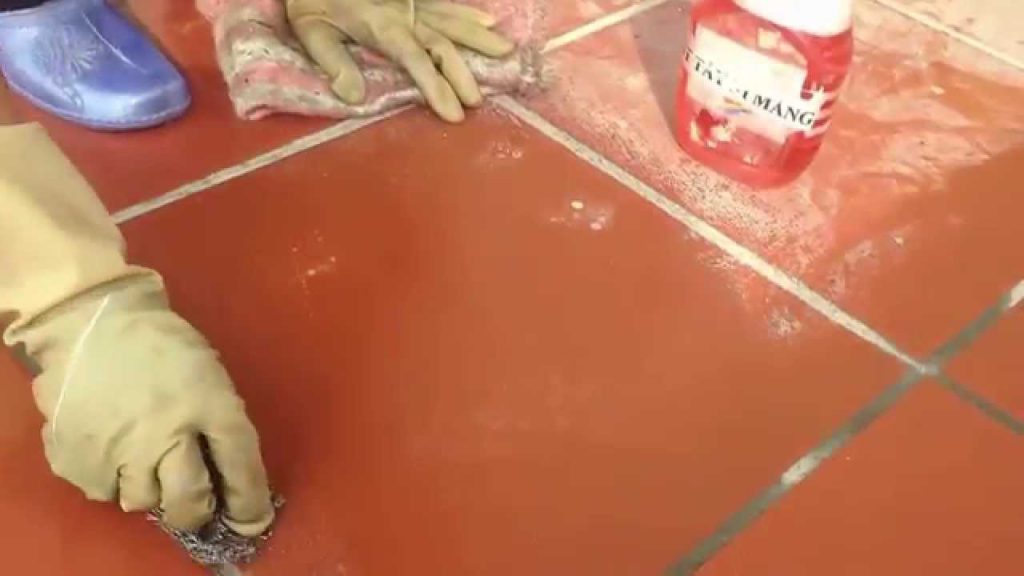
BƯỚC 3: CHÍT MẠCH
Sau khi thực hiện xong bước thứ 2 trong cách lát gạch nền nhà khoảng 3 – 4 giờ khi gạch đã bám dính vào nền thì ta tiến hành bước thứ 3 là chít mạch. Sử dụng bột chít mạch được mua ở các cơ sở cung cấp vật liệu xây dựng để thực hiện.
Dùng bay có mũi nhọn đưa lượng bột chít mạch vừa đủ vào những mạch cần chít. Sau đó cũng lấy bay hớt lớp vữa thừa khi trít mạch ra ngoài. Lưu ý không nên để rơi ra gạch làm bề mặt gạch bị bám bẩn gây mất thẩm mỹ.

Khoảng 6 –8 tiếng sau khi trít xong thì tiến hành chà ron. Công đoạn trà ron chia làm 2 lần. Lần một pha bột lỏng, dùng dụng cụ chuyên dụng để chà vào các khe giữa viên gạch, chà tới đâu lau ngay tới đó để đảm bảo gạch không bị bám bột gây mất thẩm mỹ. Lần 2, cách lần 1 khoảng 1 tiếng, pha bột đặc hơn lần 1, dùng bay mũi nhọn trét lại các khe gạch cho bằng mặt gạch.
Đổ lớp vữa lót vừa ngâm và trộn đều lên bề mặt nền nhà. Sử dung thước xây để tạo độ phẳng cho nền nhà. Chiều dày vữa lót lí tưởng là từ 2 – 3 cm. Không nên sử dụng quá dày gây ra tình trạng khó thi công.
BƯỚC 4: LÀM SẠCH BỀ MẶT NỀN
Khâu cuối cùng trong cách lát gạch nền nhà là làm sạch bề mặt nền. Khâu này có vẻ đơn giản, nhưng lại là quá trình quan trọng bậc nhất trong kỹ thuật hoàn thiện nhà để nền nhà có màu sắc tự nhiên và thẩm mỹ cao.
Sau khoảng từ 24 – 36 tiếng khi mạch vữa đã khô cứng thì ta bắt đầu tiến hành lau các vết vữa bám trên nền gạch bị vương vãi trong quá trình thi công. Những chỗ nào còn vữa bạn dùng vải hoặc rẻ để lau nền cho sạch.
Xả nước vào nền nhà lần cuối cho nền nhà đẹp hơn, sáng bóng hơn.
Đổ lớp vữa lót vừa ngâm và trộn đều lên bề mặt nền nhà. Sử dung thước xây để tạo độ phẳng cho nền nhà. Chiều dày vữa lót lí tưởng là từ 2 – 3 cm. Không nên sử dụng quá dày gây ra tình trạng khó thi công.
NHỮNG LƯU Ý TRONG CÁCH LÁT GẠCH NỀN NHÀ
- Sử dụng gạch lát nền đúng tiêu chuẩn, quy cách, không bị cong vênh, sứt mẻ, rạn nứt.
- Nên chọn gạch có cùng mã sản phẩm (kích thước và màu sắc đồng đều, cùng 1 lô sản xuất)
- Trước khi lát nền không làm ẩm sản phẩm.
- Gạch lát nền cần được làm sạch, bề mặt không để vôi, vữa, các chất bẩn hay tạp chất bám vào.
- Trước khi thi công phải tạo cốt nền bằng phẳng, không bị sụt lún, tạo độ chắc chắn có thể đi lại được.
- Đổ bê tông thấp hơn so với cốt 0-0 từ 3 – 5cm là tốt nhất để nền nhà sau này không bị cao hơn, gây ảnh hưởng nhiều hạ mục khác như cửa hay phong thủy gia chủ chọn.
- Tùy vị trí lát nền, định vị mặt sàn theo cốt 0-0 là phẳng thăng bằng hay phẳng dốc.
- Cán vữa trộn xi măng và cát đen theo tiêu chuẩn mác vữa sao cho bề mặt nền thật phẳng không lồi lõm.
Trên đây là những kiến thức cơ bản về cách thức lát gạch nền nhà. Hy vọng những thông tin này hữu ích với bạn, và bạn có thể áp dụng chúng trong tương lai.
Muốn thiết kế – thi công ốp lát nền sàn nhà, xin vui lòng liên hệ:
CÔNG TY XÂY DỰNG MV
– MỜI VÀO NHÀ TÔI
Hotline: 0908.66.88.10 – 09.0202.5707
Địa chỉ: 201 Bà Triệu, quận Hai Bà Trưng, Hà Nội
Email: gdmoivaonhatoi@gmail.com
Website:
https://moivaonhatoi.com/


